Organize Transactions with our Digital Banking!
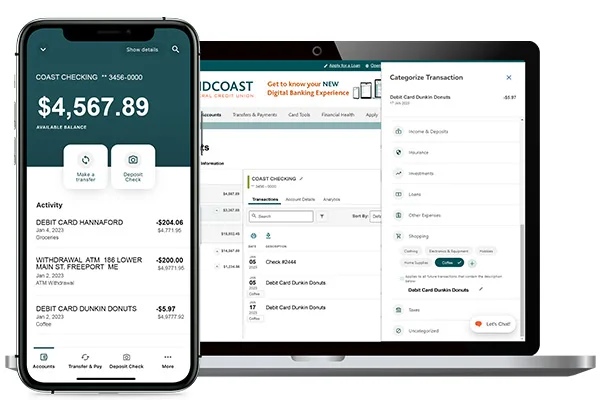
One of the great features of Digital Banking application is the ability to set Transaction Memos and Categories. Organize your financial activities by adding brief descriptions of your transactions in the memo section and setting up categories to easily identify and coordinate similar items. Crunch the numbers on your financial moves to see what you’re spending, build a budget, or detailed spending reports! Start organizing now via desktop or mobile.

Memo for Transfers
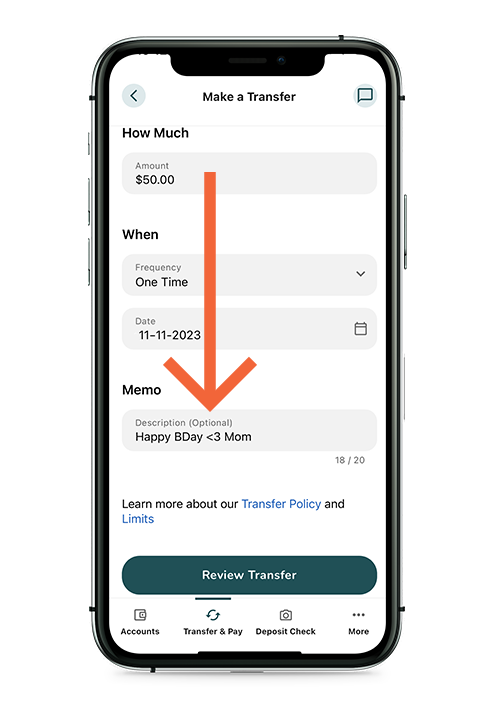
An optional memo can be added to any active payment or transfer. This can be used to enter specific information about the transfer that you may want to record (i.e. invoice number, work order number, etc.) or even act as a message to the recipient.
Example: add a “Happy Birthday” message to a member-to-member funds transfer, or maybe get organized for next year’s taxes by labeling and creating categories for your charitable donations or business-expense deductions.
This information will be stored and displayed for reference purposes in the Scheduled and History tab (Activity list on mobile) under the transfer detail.
Follow these steps to add a Memo to your completed transactions:
1) From the Digital Banking Accounts screen, select the account you’d like to work with (ie: Coast Checking / Prime Share) Your recent transactions will display.
2) Select a transaction from the list.
3) Locate the “Memo” field and select the pencil icon to edit/add your text. You may enter a maximum of 40 characters.
Follow these steps to add Categories to your transactions:
Digital Banking will automatically assign a category for your transactions, but if you want to be more specific, you can create and apply your own custom ones. As long as there is not a change to the Merchant’s information, Digital Banking will recognize your future transactions and categorize it accordingly.
1) From your Computer/Desktop, log into your Digital Banking profile.
2) Select the account you’d like to work with (i.e: Coast Checking/Prime Share) Your recent transactions will display.
3) Select a transaction form the list, then navigate to the “Category” field.
4) Click the currently listed “Category” and that will open the full category panel. There are 18 primary categories and 58 provided sub-categories, PLUS, you also have the ability to add additional “custom” sub-categories as needed.
Primary Categories Include:
Auto, Commute & Travel; Bills & Subscriptions; Business Expenses; Cash & Transfers; Education; Family & Pets; Fees & Payments; Food, Dining & Entertainment; Giving; Health & Personal Care; Income & Deposits; Insurance; Investments; Loans; Other Expenses; Shopping; Taxes; Uncategorized.
You can select one of the 58 provided sub-categories, or click the + sign in your preferred primary section and type in your own custom label.
5) After the category is selected, Digital Banking will recognize and categorize all future transactions from that merchant for you.
If you need assistance with Transaction Memos and Categories, or any other features in our digital banking platform, click on the “Chat” icon within the application or contact our eBranch at 877.964-3262

